The AC power adapter type cannot be determined. Your system will operate slower and the battery will not charge. Please connect a Dell 65W AC adapter or higher for best system operation.
Few weeks ago I started seeing this warning intermittantly when I connect the power adapter to my Dell XPS M1330. But for last few days it was very regular and I barely could charge the battery.
I called up Dell on Tuesday morning and since the laptop was on extended warranty (I need it with my kind of travel and usage), the scheduled a next day service. The guy showed up next day before 10am with a motherboard and a power supply. It turned out that Dell sent him a correct power cord (3-pin) for the adapter but wrong adapter (2-pin). So the technician was not able to test the adapter and had to change the mother board.
He was done in less than 30 minutes and when we put the power in, voila.. it was charging. But before he left, I tried twisting and rotating the power supplu few time and there was this warning again.
So I called him from the car and he called to FedEx me a new adapter next day. So I'm waiting for my new adapter which is supposed to come by 3pm today.
The technician said that there's a chip inside the adapter and in the laptop and generally he sees the problem with the motherboard if they are using a 3pin supply. An specially with m1330 as well.
So, in less than 2 years, this is the second mother board change and I'm off to my third motherboard already. First one was due to their famous GPU (display issue) problem.
Who know what'll happen in another 2 years.
Thursday, August 06, 2009

Tuesday, July 28, 2009
Digital Earth launched in beta website.
Digital Earth Inc just launched it beta website.
The functionality looks cool.
Detail at http://blog.pepperlab.com
The functionality looks cool.
Detail at http://blog.pepperlab.com
Wednesday, May 27, 2009
Wednesday, April 29, 2009
deleting documents from Nutch Index
Here's what you can use to delete documents from the nutch index.
bin/nutch org.apache.nutch.tools.PruneIndexTool crawl/indexes/part-00000 -queries qu.txt -output ou.txt
where
- crawl/indexes/part-00000 contains the indexes
- qu.txt is the file with a list of queries in it. one example being
"site:abc.xxx.com"
- ou.txt is the output of the document urls which (are) will be deleted
If you just want to see which documets will be effected without actually deleting them then use the -dryrun flag also.
bin/nutch org.apache.nutch.tools.PruneIndexTool crawl/indexes/part-00000 -dryrun -queries qu.txt -output ou.txt
bin/nutch org.apache.nutch.tools.PruneIndexTool crawl/indexes/part-00000 -queries qu.txt -output ou.txt
where
- crawl/indexes/part-00000 contains the indexes
- qu.txt is the file with a list of queries in it. one example being
"site:abc.xxx.com"
- ou.txt is the output of the document urls which (are) will be deleted
If you just want to see which documets will be effected without actually deleting them then use the -dryrun flag also.
bin/nutch org.apache.nutch.tools.PruneIndexTool crawl/indexes/part-00000 -dryrun -queries qu.txt -output ou.txt
US Energy Map

NPR has published an interactive map of US electric grid along with some other details like power plants, solar and wind etc.
I have been thinking about doing something similar for a long time, but this is a great start.
The map includes:
I have been thinking about doing something similar for a long time, but this is a great start.
The map includes:
- US Electric Grid with existing and proposed lines
- Power sources (including Coal, Nuclear, Gas, Hydro, Oil, Biomass, Wind) and their usage in various states.
- Power plants (including Coal, Nuclear, Gas, Hydro, Oil, Biomass, Solar, Wind) and their details
- Solar power capacity and solar power transmission lines
- Wind speed chart and proposed wind power transmission lines by and after 2030
http://www.npr.org/news/graphics/2009/apr/electric-grid/
Thursday, April 23, 2009
Apache Tomcat Native library
Error Message
"The Apache Tomcat Native library which allows optimal performance in production environments was not found"
There are many threads on the internet but most of them fail to resolve this error. What you need is couple of packages in order to get this working.
1) apr
2) tomcat-native
If you use yum, then you can just do
> sudo yum install apr tomcat-native
and this will do all the work, otherwise you might need to find the right rpm/dlls or build these from source.
"The Apache Tomcat Native library which allows optimal performance in production environments was not found"
There are many threads on the internet but most of them fail to resolve this error. What you need is couple of packages in order to get this working.
1) apr
2) tomcat-native
If you use yum, then you can just do
> sudo yum install apr tomcat-native
and this will do all the work, otherwise you might need to find the right rpm/dlls or build these from source.
Thursday, April 16, 2009
What is a ‘green job’ anyway?
 Van Jones, social activist and advisor to President Obama says a green job is "a family-supporting, career-track job that directly contributes to preserving or enhancing environmental quality."
 http://www.renewableenergyjobs.com/what_is_a_green_job/
Tuesday, April 14, 2009
Nutch 1.0
Nutch has come a long way and just released their 1.0 version. Here's are some thing which I found and might be useful to others as well.
Q: My nutch crawler only seems to find limited set of links and is not indexing all the documents from the website.
A:
i) make sure the depth is defined long enough to crawl thru all the pages.
crawl -d urldir -dir crawl-dir -depth 20 -threads 10-topN 50
ii) make sure the default page size of 65536 is increased to appropriate limit to read the whole page. This is defined with http.content.limit.
iii) Most important is db.max.outlinks.per.page property. Make sure its large enough (or -1) to conver your content. Default is 100.
Q: How do I control which sites are crawled?
A: You can control which sites to control in crawl-urlfilter.txt if you are using the crawl command which is asingle commandfto perform all the steps. If you do not use the crawl command, then you can use db.ignore.external.links property and set it to "true" and it'll use only the sites within the seed list.
Q: How do I crawl only a given set of sites. Should I be using crawl-urlfilter?
A: crawl-urlfilter.txt is used only while crawling and contains the regular expression to control te websites. A better way to do this is using domain-urlfilter.txt where you can specify which domains, TLD or otherwise, to use. Its just a list of domains like
net
xxx.org
foo.bar.cn
in
One thing to note here is if you include "in" as a domain name and one of the "in" sites like http://www.foo.in/ redirects you too www.bar.com/in then you'll end up getting this .com site as well because the urlfilter runs before the fetch and doesn't know about the redirect.
If you don't want this behavior, you can set http.redirect.max to 0 (zero).
Q: How to exclude some file types/extensions which I don't want to crawl.
A: Use suffix-urlfuilter.txt to include file extensions which you don't want.
Q: My nutch crawler only seems to find limited set of links and is not indexing all the documents from the website.
A:
i) make sure the depth is defined long enough to crawl thru all the pages.
crawl -d urldir -dir crawl-dir -depth 20 -threads 10-topN 50
ii) make sure the default page size of 65536 is increased to appropriate limit to read the whole page. This is defined with http.content.limit.
iii) Most important is db.max.outlinks.per.page property. Make sure its large enough (or -1) to conver your content. Default is 100.
Q: How do I control which sites are crawled?
A: You can control which sites to control in crawl-urlfilter.txt if you are using the crawl command which is asingle commandfto perform all the steps. If you do not use the crawl command, then you can use db.ignore.external.links property and set it to "true" and it'll use only the sites within the seed list.
Q: How do I crawl only a given set of sites. Should I be using crawl-urlfilter?
A: crawl-urlfilter.txt is used only while crawling and contains the regular expression to control te websites. A better way to do this is using domain-urlfilter.txt where you can specify which domains, TLD or otherwise, to use. Its just a list of domains like
net
xxx.org
foo.bar.cn
in
One thing to note here is if you include "in" as a domain name and one of the "in" sites like http://www.foo.in/ redirects you too www.bar.com/in then you'll end up getting this .com site as well because the urlfilter runs before the fetch and doesn't know about the redirect.
If you don't want this behavior, you can set http.redirect.max to 0 (zero).
Q: How to exclude some file types/extensions which I don't want to crawl.
A: Use suffix-urlfuilter.txt to include file extensions which you don't want.
Sunday, January 11, 2009
Windows 7 on NC4010 - part 2

It failed on installing ZoneAlarm Free Basic version..with the following error.
Windows 7 on NC4010 - Part 1

I decided to check out the new Windows 7 Beta since I wasn't so impressed with Windows Vista and had read great things about how fast Windows 7 is...
Since I still needed a working laptop so I sared my new Dell XPS m1330 and instead installed the Windows 7 beta on the older HP/Compaq NC4010 laptop.
There are many Windows 7 Beta images on the internet but since Microsoft has made it available online you can download it from here:
You'll see that once you select a langauge and version (32bit or 64 bit), it takes you to a sign in page and you need to have Windows Live or a Hotmail account.
After logging in, you'll see a Product Beta key and a button for downloading it. When you start downloading, you'll need to install an ActiveX control for a download manager otherwise it doesn't start the download....

Also if you decide to bypass it and use Firefox, the download button will not work in Firefox and clicking on the button will have not effect.
Similarly, Google Chrome will also not work.
So you are stuck with installing the ActiveX control which you can de-install or de-activate after downloading the complete ISO image.
There are directions as well on the Download page.
Compaq NC4010 is a compact laptop so it doesn't has any DVD/CD bay drive and the issue was how to install?
I copied the complete ISO image in the hard-disk of the laptop and extracted the files using ISOBuster.
Then it was as easy as clicking on Setup.exe to start the installation.
Once you start installing, there are two options: 1) Upgrade or 2) Complete install.
I started with Upgrade but it soon crapped out since I was upgrading from XP and it only supports upgrade from Windows Vista. I then had to choose Complete install but did not do any hard disk partitoning since it would erase my ISO image which was in the same hard disk.
When installing, it renames the previous Windows installation to WINDOWS.OLD which you can erase after the installation finishes.
The installation went pretty event-free and it rebooted couple of times in between but finally prompted my confirm the date and timezone. Next prompt was to create a username and computer name.
It installed most of the drivers automatically but I had to install the Audio, Video drivers seperately and even the XP version of these drivers worked fine.
Although Wireless was a different story (Intel Pro Wireless LAN 2100 3B Mini PCI Adapter). It couldn't auto install the drivers and the XP drivers also failed.
Since HP website does not provide VISTA drivers for this latop, I downloaded the new VISTA drivers for this card from the Intel website and it was fine after that.
Only thing remaining now is the Micro O2 card bus drivers which I'll download and try.
So far, it looks a lot responsive and fast. The boot time is also significantly better.
Tuesday, November 25, 2008
dell xps m1330 nvidia gpu failure

It seems to be a fairy common problem with Dell XPS M1330 GPUs which are NVIDIA 8400GS series.
I started seeing this problem few days ago after using this laptop for 11 months. I've very extensive experience with laptops and was wise enough to take a 1+3 yrs extended warranty plan since I know there are many more things which will go wrong with a laptop with the kind of travel I do.
The problem generally starts where the machine starts to hang at various times without any pattern. Sometime the mouse will stop responding for few seconds and then become active again and then the whole system hangs.
Ater few of such incidents, you'll notice that the machine won't start and you'll see the random color vertical lines (just like in the picture above). They'll start to appear from the left and thne slowly fill the whole screen and then start to disappear from the left again.
Some people have mentioned that it could be horizontal lines as well instead of vertical lines.
Although you might be able to boot successfully if you wait for sometime and might be able to work as well. For me, it didn't work for few hours even after I completed some display and other diagnostic tests but then the laptop worked fine for the whole of next day. And, same problem returned the following day.
Display Test: With machine in the off state, press "D" and the power button, release the power button and once the caps lock light is flashing, release the "D" button.
Complete Diagnostic Test: With machine in the off state, press the "Fn" button and power button, release the power button and wait for the top right to show "diagnostic..." or lights next to the power button start to blink and then release the function button.
All these test will be fine if its a GPU problem.

Sometime you are lucky enough to see the boot screen and actually boot the machine, but you might see randon "Blue Scree of Death" like the one here...
The technician showed up in two working days and replaced the completed mother board, the heatsink and fan assembly and I was good to go in 45 minutes.
They haven't seen any more problems with the updated GPUs but nVidia failed to mention if it was a problem with the GPU generating more heat or somthing in the GPU itself. But anthing which get hot (and hotter) will fail eventually.
Thursday, November 20, 2008
mysqldump with stored procedures, triggers and functions.
Dumping data with mysqldump could be tricky with all the available options. If you are looking to backup all the data and triggers, here's the set of options you need.
backup complete database
mysqldump -u myusername--password=mypassword --databases mydatabase --skip-opt --routines > dump.sql
if you only want to backup the triggers and functions etc then you could use
mysqldump -u myusername--password=mypassword --database mydatabase --skip-opt --routines --no-create-info --no-data --no-create-db > no-data-dump.sql
Use --opt if you want to include the auto_increment as well in the create command.
backup complete database
mysqldump -u myusername
if you only want to backup the triggers and functions etc then you could use
mysqldump -u myusername
Use --opt if you want to include the auto_increment as well in the create command.
Monday, November 03, 2008
Intel Mash Maker
Recently came across this browser extension from Intel which can be used to pull in information from various Web sites to create cool mashups.
There are widget APIs as well which can be very useful for quick applications using Web services.
http://mashmaker.intel.com/web/
There are widget APIs as well which can be very useful for quick applications using Web services.
http://mashmaker.intel.com/web/
Wednesday, May 14, 2008
Disabling Security Center automatic updates warning in Windows XP
Even when you disable the Windows Automatic Updates in security center, Windows XP prompts you with a warning dialog every time you boot up.
This will disable that warning dialog box.
Add or edit the following registry entry.
HKEY_LOCAL_MACHINE\SOFTWARE\Microsoft\Security Center
Data Type: DWORD
Value Name: UpdatesDisableNotify
Value: 1
The machine would need a reboot for this change to take effect.
This will disable that warning dialog box.
Add or edit the following registry entry.
HKEY_LOCAL_MACHINE\SOFTWARE\Microsoft\Security Center
Data Type: DWORD
Value Name: UpdatesDisableNotify
Value: 1
The machine would need a reboot for this change to take effect.
Tuesday, March 25, 2008
removing Search Box on IE7
I've been using Google Toolbar for a long time and have gotten used to it, so don't like the clutter of other search boxes as toolbars.
Here's how to remove Search Box on Internet Explorer 7 (IE7)
1) run Group Policy Editor using ... Start Menu --> Run --> gpedit.msc
2) Browse to
User Configuration -->
Administrative Templates -->
Windows Compoments -->
Internet Explorer.
3) On the right pane, double click on the setting
"Prevent the Internet Explorer search box from displaying" and change it to Enabled.
Restart IE.
Here's how to remove Search Box on Internet Explorer 7 (IE7)
1) run Group Policy Editor using ... Start Menu --> Run --> gpedit.msc
2) Browse to
User Configuration -->
Administrative Templates -->
Windows Compoments -->
Internet Explorer.
3) On the right pane, double click on the setting
"Prevent the Internet Explorer search box from displaying" and change it to Enabled.
Restart IE.
configuring XP Start Menu -> Right click -> Explore action
I often right click on Windows XP Start menu button and then click on the "Explore" link to open the windows explorer. It'll always opens the following location which I'd then close and open the path I want.
C:\ --> Document and Settings -->--> Start Menu.
Here's a registry tweak to change that to your favorite location.
Happy Exploring !!
C:\ --> Document and Settings -->
Navigate to
HKEY_CLASSES_ROOT\Folder\shell\explore\ddexec
On the right pane, right-click on "default" and pick Modify.
On the Value Data line, reaplce both isntances of '%I' with your favorite folder as
[ExploreFolder("D:\workspace", D:\workspace,%S)]
Happy Exploring !!
Friday, March 14, 2008
Enabling AHCI mode after installing Windows (on a Dell XPS m1330)
The day I day I received my Dell XPS m1330 LED, I reformatted the hard-drive and installed Windows XP on it. Since XP doesn't come with AHCI drivers you need to do the F6 trick (and supply the driver disk) during the installation process. I didn't bother with it and just installed it after changing the mode as ATA in the BIOS.
<spam>
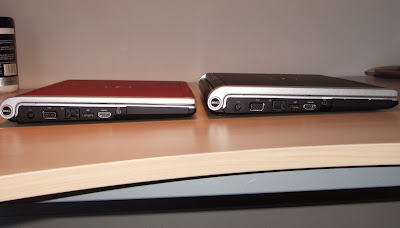
here's a comparison of LED (left) vs LCD (right) screens on Dell m1330 XPS
</spam>
Recently, I decided to change the mode to AHCI and followed the instructions on http://forums.pcper.com/showthread.php?t=444831 to enable the AHCI mode back on but wasn't able to successfully do it and kept seeing the BSOD.
Here's what the above website says:
1) Download the Intel Matrix Storage Manager from
http://downloadcenter.intel.com/Product_Filter.aspx?ProductID=2101&lang=eng
2) Extract it using the
iata76_enu.exe -a
on a command line and it'll extract all the files in
C:\Program Files\Intel\Intel Matrix Storage Manager\...
3) Copy the iaStor.sys file from the above directory (Drivers or Drivers64) to
C:\Windows\system32\drivers
4) Copy the following code in a file, say ahci.reg and then run the file to add entries to registry.
There were couple of different versions of the registry entries but a user combined all of them into one and here's the code
5) Reboot the computer and do not boot the Windows and instead go to BIOS setup.
6) Change the setting to AHCI mode, save and exit
7) Boot the Windows, it'll identify a new drive and install the drivers and ask you to reboot.
8) Happy ever after.
Instead, It didn't work for me and I kept getting the BSOD even after changing many different registry entries.
I ended up downloading the driver for Intel SATA from the dell website (R154200.EXE) and then unzipped it. If you use the iaStor.sys from this file and follow the above procedure, you should be fine and the laptop should boot without any problems.
Final note from the website,
All this process worth nothing if you forget at the end to go to device manager, double klick your hard-drive(s) under "disk drivers", go to "policies" tab and mark "Enable write caching for this disk" (I recommend adding this to the guide)
<spam>
here's a comparison of LED (left) vs LCD (right) screens on Dell m1330 XPS

</spam>
Recently, I decided to change the mode to AHCI and followed the instructions on http://forums.pcper.com/showthread.php?t=444831 to enable the AHCI mode back on but wasn't able to successfully do it and kept seeing the BSOD.
Here's what the above website says:
1) Download the Intel Matrix Storage Manager from
http://downloadcenter.intel.com/Product_Filter.aspx?ProductID=2101&lang=eng
2) Extract it using the
iata76_enu.exe -a
on a command line and it'll extract all the files in
C:\Program Files\Intel\Intel Matrix Storage Manager\...
3) Copy the iaStor.sys file from the above directory (Drivers or Drivers64) to
C:\Windows\system32\drivers
4) Copy the following code in a file, say ahci.reg and then run the file to add entries to registry.
There were couple of different versions of the registry entries but a user combined all of them into one and here's the code
Windows Registry Editor Version 5.00
[HKEY_LOCAL_MACHINE\SYSTEM\ControlSet001\Control\CriticalDeviceDatabase\pci#VEN_8086&DEV_2922&CC_0106]
"Service"="iaStor"
[HKEY_LOCAL_MACHINE\SYSTEM\ControlSet001\Control\CriticalDeviceDatabase\pci#VEN_8086&DEV_282A&CC_0104]
"Service"="iaStor"
[HKEY_LOCAL_MACHINE\SYSTEM\ControlSet001\Control\CriticalDeviceDatabase\pci#VEN_8086&DEV_2829&CC_0106]
"Service"="iaStor"
[HKEY_LOCAL_MACHINE\SYSTEM\ControlSet001\Control\CriticalDeviceDatabase\pci#VEN_8086&DEV_2822&CC_0104]
"Service"="iaStor"
[HKEY_LOCAL_MACHINE\SYSTEM\ControlSet001\Control\CriticalDeviceDatabase\pci#VEN_8086&DEV_2821&CC_0106]
"Service"="iaStor"
[HKEY_LOCAL_MACHINE\SYSTEM\ControlSet001\Control\CriticalDeviceDatabase\pci#VEN_8086&DEV_2682&CC_0104]
"Service"="iaStor"
[HKEY_LOCAL_MACHINE\SYSTEM\ControlSet001\Control\CriticalDeviceDatabase\pci#VEN_8086&DEV_2681&CC_0106]
"Service"="iaStor"
[HKEY_LOCAL_MACHINE\SYSTEM\ControlSet001\Control\CriticalDeviceDatabase\pci#VEN_8086&DEV_27C3&CC_0104]
"Service"="iaStor"
[HKEY_LOCAL_MACHINE\SYSTEM\ControlSet001\Control\CriticalDeviceDatabase\pci#VEN_8086&DEV_27C6&CC_0104]
"Service"="iaStor"
[HKEY_LOCAL_MACHINE\SYSTEM\ControlSet001\Control\CriticalDeviceDatabase\pci#VEN_8086&DEV_27C1&CC_0106]
"Service"="iaStor"
[HKEY_LOCAL_MACHINE\SYSTEM\ControlSet001\Control\CriticalDeviceDatabase\pci#VEN_8086&DEV_27C5&CC_0106]
"Service"="iaStor"
[HKEY_LOCAL_MACHINE\SYSTEM\ControlSet001\Control\CriticalDeviceDatabase\pci#VEN_8086&DEV_2653&CC_0106]
"Service"="iaStor"
[HKEY_LOCAL_MACHINE\SYSTEM\CurrentControlSet\Services\iaStor]
"Type"=dword:00000001
"Start"=dword:00000000
"Group"="SCSI miniport"
"ErrorControl"=dword:00000001
"ImagePath"="system32\\drivers\\iaStor.sys"
"tag"=dword:00000019
"DisplayName"="Intel AHCI Controller"
[HKEY_LOCAL_MACHINE\SYSTEM\CurrentControlSet\Services\iaStor\Parameters]
"queuePriorityEnable"=dword:00000000
[HKEY_LOCAL_MACHINE\SYSTEM\CurrentControlSet\Services\iaStor\Enum]
"0"="PCI\\VEN_8086&DEV_2821&SUBSYS_B0051458&REV_02\\3&13c0b0c5&0&FA"
"Count"=dword:00000001
"NextInstance"=dword:00000001
5) Reboot the computer and do not boot the Windows and instead go to BIOS setup.
6) Change the setting to AHCI mode, save and exit
7) Boot the Windows, it'll identify a new drive and install the drivers and ask you to reboot.
8) Happy ever after.
Instead, It didn't work for me and I kept getting the BSOD even after changing many different registry entries.
I ended up downloading the driver for Intel SATA from the dell website (R154200.EXE) and then unzipped it. If you use the iaStor.sys from this file and follow the above procedure, you should be fine and the laptop should boot without any problems.
Final note from the website,
All this process worth nothing if you forget at the end to go to device manager, double klick your hard-drive(s) under "disk drivers", go to "policies" tab and mark "Enable write caching for this disk" (I recommend adding this to the guide)
Wednesday, March 12, 2008
building tag clouds

Hey !! Don't it look pretty.
These are some of the oil and gas basins of the world. I've been working on getting a tag-cloud for these so they can be included as a part of a bigger project which I'm working on. The Color and Size are based on the occurance of these basin names in a huge list of documents.
In the next post, I'll show you how to build this.
These are some of the oil and gas basins of the world. I've been working on getting a tag-cloud for these so they can be included as a part of a bigger project which I'm working on. The Color and Size are based on the occurance of these basin names in a huge list of documents.
In the next post, I'll show you how to build this.
getting up and running with WAMP
WAMP: Windows XP, Apache Tomcat 6, MySQL and PHP.
Having been done this many times on Linux, I decided to setup my laptop with all these tech-essentials.
The first step was to get these running indipendently and then making sure that they run together.
1) Tomcat 6
This was probably the easiet to get up and running.
1.1 --> Just unzip/untar the package under D:\ say as tomcat6.
1.2 --> Go to D:\tomcat6\bin and execute startup.bat
1.3 --> Change the port number in D:\tomcat6\conf\server.xml, if you want to.
2) MySQL
I decided to go with no-install executable so I can start and stop the server wheneven I want.
2.1 --> It was unzipped under D:\mysql
2.2 --> You can put the following directory under the PATH
D:\mysql\bin
2.3 --> start the server as "mysqld --verbose"
2.4 --> shutdown the server using "mysqladmin -u root shutdown"
2.5 --> you can test the connection using mysql -u root
play away.
3) PHP with Tomcat
3.1--> Download the zip package or installer from Windows Binaries section of this url
http://us3.php.net/downloads.php
3.2 --> Download the pecl Win32 binaries from the above page
3.3 --> Unzip php to D:\php
3.4 --> Unzip pecl to D:\pecl
3.5 --> copy D:\php\php.ini-dist to D:\php\php.ini
3.6 --> In php.ini, uncomment the following line by removing the ";" (semi colon) or if the line doesn't exist, please add it
;extension=php_java.dll
3.7 --> Copy the php5servlet.dll from D:\pecl to D:\php
3.8 --> Create the following directory path in tomcat
D:\tomcat6\webapps\php\WEB-INF\lib
3.9 -->Create a file
D:\tomcat6\webapps\php\WEB-INF\web.xml
with the following content
<?xml version="1.0" encoding="ISO-8859-1"?>
<!DOCTYPE web-app PUBLIC
  "-//Sun Microsystems, Inc.//DTD Web Application 2.3//EN"
  "http://java.sun.com/dtd/web-app_2_3.dtd">
<web-app>
    <servlet>
          <servlet-name>php</servlet-name>
          <servlet-class>net.php.servlet</servlet-class>
    </servlet>
     <servlet>
          <servlet-name>php-formatter</servlet-name>
          <servlet-class>net.php.formatter</servlet-class>
     </servlet>
     <servlet-mapping>
           <servlet-name>php</servlet-name>
           <url-pattern>*.php</url-pattern>
     </servlet-mapping>

     <servlet-mapping>
           <servlet-name>php-formatter</servlet-name>
           <url-pattern>*.phps</url-pattern>
     </servlet-mapping>
</web-app>
3.10 --> Unjar the phpsrvlt.jar from the D:\pecl directory. If you un-jar is under D:\, one of the path would look like
D:\net\php
The two files under this directory will be reflect.properties and servlet.properties.
3.11 --> make sure the line in the above properties files looks like
library=php5servlet
this needs to be same as the dll which you copied in step 3.7
3.12 --> If you changed the above files to correct the library parameter, then re-create the jar file using the command below from D:\
jar cvf php5srvlt.jar net/php/*.*
3.13--> copy the jar file to
D:\tomcat6\webapps\php\WEB-INF\lib
3.14 --> Add PHP to your System or User PATH variable.
3.15 --> Create a test file called
D:\tomcat6\webapps\php\test.php
with the following content
3.16 --> start your tomcat server and test the PHP installation by going to
http://localhost:8080/php/test.php
If everything is working fine, then you'll see lot of php details on the webpage
4) PHP with Tomcat and MySQL
4.1 --> Unzip the following lines from D:\php\php.ini, or add them if they do not exist
;extension=php_mysql.dll
;extension=php_mysqli.dll
4.2 --> Copy the following files from D:\php\ext to D:\php
php_mysql.dll
php_mysqli.dll
Or you can also change the following property in php.ini
extension_dir = "d:\php\ext"
and move all the dll's to D:\php\ext
4.3 --> Test the php integration with mysql under tomcat. Make sure to restart the webserver.
4.4 --> If it still doesn't work, sometime you need to copy the above DLL's to C:\windows\system32 directory.
Good luck.
Subscribe to:
Posts (Atom)